Your nose, a central feature of your face, holds the power to subtly shift the balance and harmony of your facial proportions. However, not all noses are created equal, and the diversity of nose shapes demands tailored approaches to makeup contouring. Whether your nose boasts a delicate button shape or a prominent bridge, learning how to manipulate light and shadow effectively can help you harness the full potential of makeup contouring to accentuate your natural beauty.
Basic Nose Contouring Techniques
Highlighting and Contouring Principles
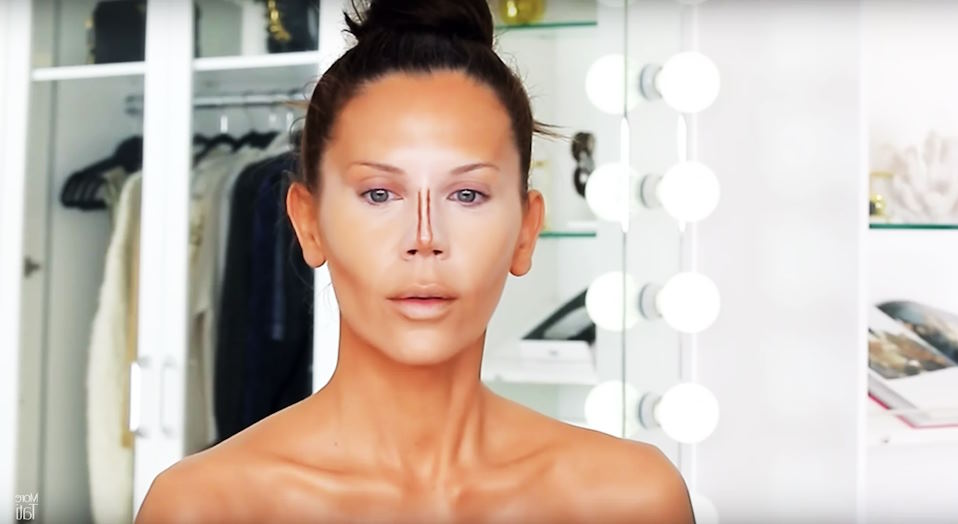
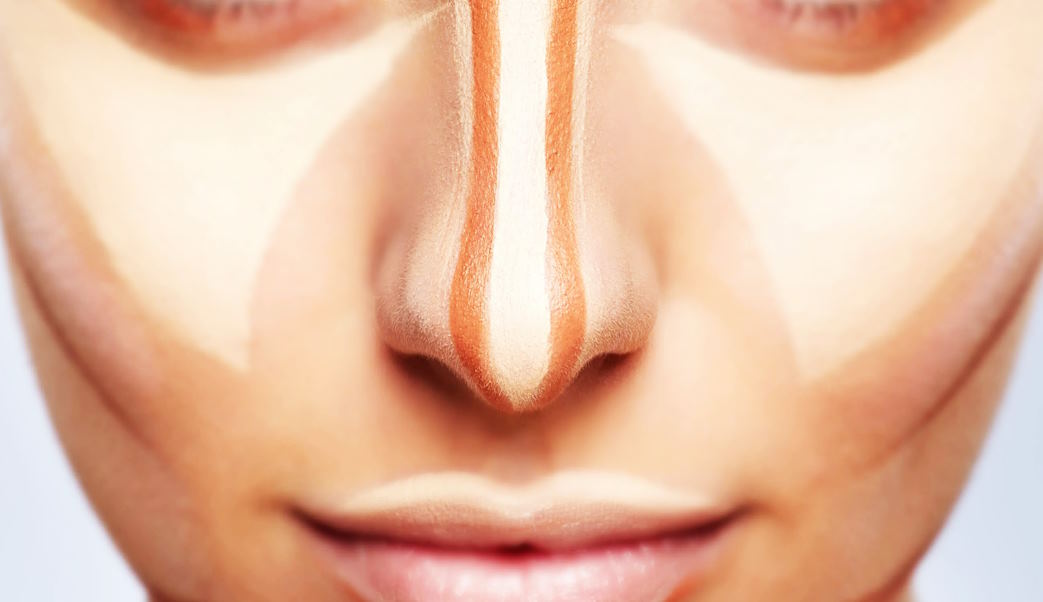
Nose contouring relies on the interplay of light and shadow to create the illusion of dimension and symmetry. The basic principle involves using a darker shade to create shadows and recede certain areas of the nose, while a lighter shade is applied to highlight and bring forward other areas. Typically, a matte contour shade that is a few shades darker than your natural skin tone is used to define the sides of the nose and the tip, while a lighter shade, often in a matte or shimmer finish, is applied down the center of the nose to accentuate its height.
Mapping Out Your Nose Contour
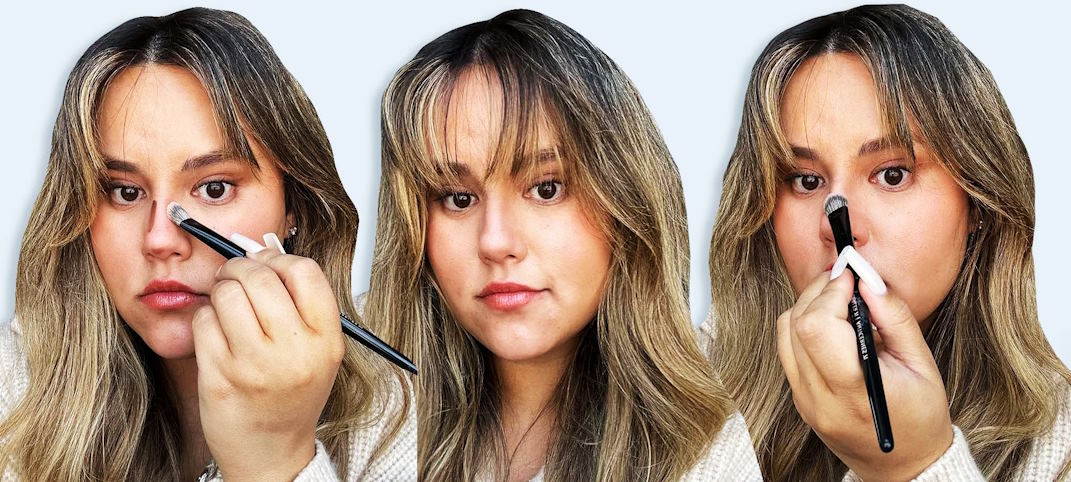
Before diving into contouring, it’s essential to map out your nose contour to ensure precision and symmetry. Using a makeup pencil or a light hand with your contouring product, identify the areas you want to contour and highlight. Common areas for contouring include the sides of the nose to slim the appearance, the tip to create definition, and the bridge to add height. Similarly, highlighting the bridge and tip of the nose can draw attention to these features and create the illusion of a more sculpted nose.
Blending Techniques for Seamless Results
The key to achieving natural-looking nose contouring lies in seamless blending. After applying your contour and highlight shades, use a blending brush or sponge to gently diffuse the product along the nose. Small, circular motions can help blend the colors seamlessly into your skin, avoiding harsh lines or patches of color. Remember to blend the edges of the contour and highlight shades into the surrounding skin to create a subtle transition. Take your time with blending, as it can make all the difference in achieving a flawless and natural-looking nose contour.

Tools and Products for Nose Contouring
Types of Makeup Brushes for Contouring
Selecting the right tools is crucial for achieving precise and flawless nose contouring. For contouring the nose, consider using brushes with small, tapered heads or angled bristles. These brushes allow for precise application and blending of contour products along the curves of the nose. Alternatively, you can also opt for makeup sponges, such as beauty blenders, for a softer and more diffused contour. Experiment with different brush shapes and sizes to find what works best for your nose shape and desired contouring effect.
Recommended Contouring Products
When it comes to choosing contouring products for your nose, opt for matte powder or cream formulas that are a few shades darker than your natural skin tone. Powder contours are excellent for beginners as they are easy to blend and provide buildable coverage. Cream contours, on the other hand, offer a more seamless and long-lasting finish, ideal for those with oily skin or for achieving a more sculpted look. Look for contouring palettes that offer a range of shades to suit different skin tones and preferences.
Alternative Tools and Techniques
In addition to traditional makeup brushes and contouring products, there are alternative tools and techniques you can explore for nose contouring. Some people prefer using their fingers to apply and blend contour products, as the warmth of the skin can help melt the product seamlessly into the skin. Additionally, you can use makeup stencils or tape to create precise lines and shapes for your nose contour. Experiment with different tools and techniques to find what works best for you and your unique nose shape.

Tips for Natural-Looking Nose Contouring
Avoiding Common Mistakes
To achieve a natural-looking nose contour, it’s crucial to steer clear of common mistakes that can result in an overly harsh or unnatural appearance. One common pitfall is using too much product, which can lead to a heavy, cakey finish. Additionally, avoid applying contour too close to the edges of the nose, as this can create an unflattering “striped” effect. Instead, focus on strategically placing the contour along the natural shadows and contours of your nose for a more subtle and realistic result.
Using Minimal Product for Subtle Effects
Less is often more when it comes to nose contouring for a natural look. Instead of layering on heavy product, start with a light hand and build up gradually as needed. Opt for sheer or buildable formulas that allow you to control the intensity of the contour. Remember, it’s easier to add more product than it is to remove excess, so start with a conservative amount and adjust as necessary.
Blending for a Seamless Finish
Blending is the key to achieving a seamless and natural-looking nose contour. Take the time to blend the contour and highlight shades thoroughly using gentle, circular motions. Pay special attention to the edges of the contour to ensure a smooth transition into the surrounding skin. Use a clean blending brush or sponge to soften any harsh lines and blend out any excess product. With patience and practice, you can master the art of blending for a flawless and undetectable nose contour that enhances your natural beauty.

